Option 1: Generation and printing via Carrier Connect user interface
Documents for the selected printer model (e.g. ZEBRA GX420d 203dpi) are generated and printed directly via the Carrier Connect user interface.
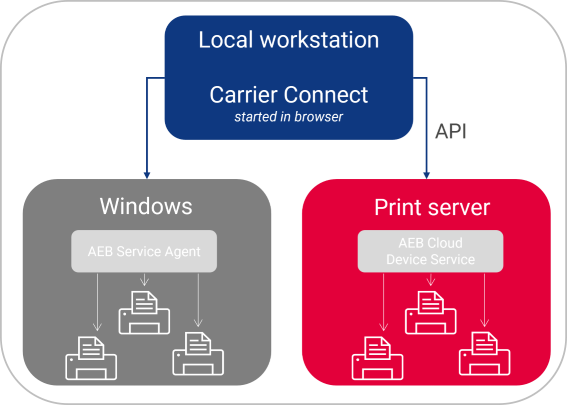
Documents can be printed in either of two locations:
- A printer installed locally on the workstation
- A printer installed on a server (such as a print server)
Use case
The use case for initiating the print process through the Carrier Connect user interface is if you enter your shipping orders manually in Carrier Connect – if you want to test the application without linking your host system, for example, or if for any other reason you wish to manage shipping orders directly in the application.
How it works
Install AEB Service Agent or AEB Cloud Device Service
Install the AEB Service Agent locally (see “Using the AEB Service Agent with installation”) or use the AEB Cloud Device Service for your printers installed on the print server (see “Using the AEB Cloud Device Service”).
Connect printers and assign users
Before you can have your shipping documents automatically printed out on a specific printer, you must first define your printers (see “Connecting printers”), then define the workstations and assign users (see “Defining workstations and assigning users”).
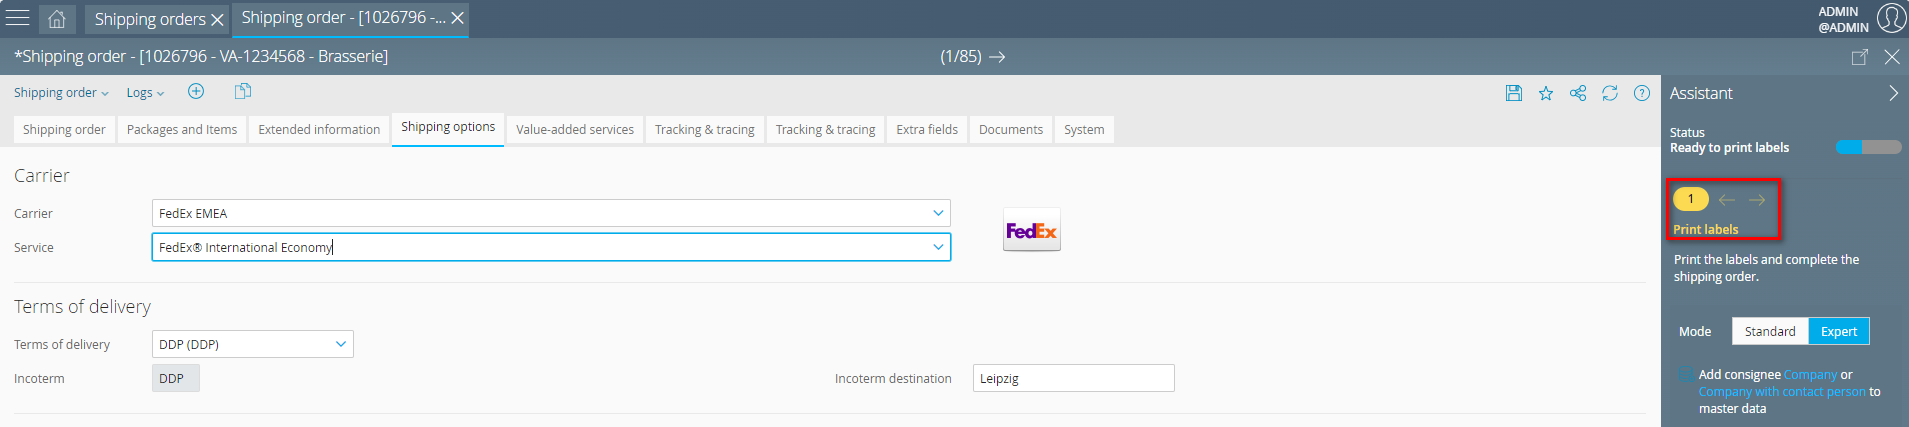
Print labels
If the status of the shipping order is “Ready to print labels,” clicking the Print labels button batch-prints all the shipping order’s labels on the printer linked to the specified workstation.
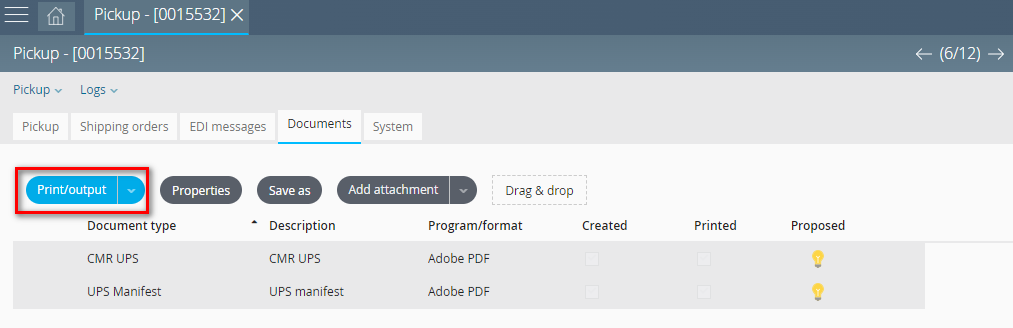
Print manifest
If the status of the pickup is “Manifest created,” clicking the Print/Output button prints out the documents on the printer linked to the specified workstation.

If you have already familiarized yourself with option 2 a/b: The print job agent does not need to be started here (option 1), because when you opt for manual printing directly from the Carrier Connect user interface, the print jobs are sent directly to the printer and not put into a print job table.