Creating printers and using own printer settings
In Carrier Connect, a printer controls for which printer model (e.g. Zebra ZT411 with 300dpi resolution) a document is to be generated. If physical printing is to happen via Carrier Connect, a printer can be used to control on which physical printer the previously generated document is to be printed.

To understand how printing documents in Carrier Connect works, you should be aware of the difference between generating and physically printing the document: Generating and printing documents.

AEB tested and approved many common printer models for you so that you can easily set them up in Carrier Connect. Check the Carrier Connect system requirements (AEB Cloud) for a list of these printers. If you don’t see your printer model in the list, create a ticket in the AEB Help Center. Report the printer model and resolution (dpi) so that we can run a feasibility test and provide you with a non-binding quote.
How to create printers
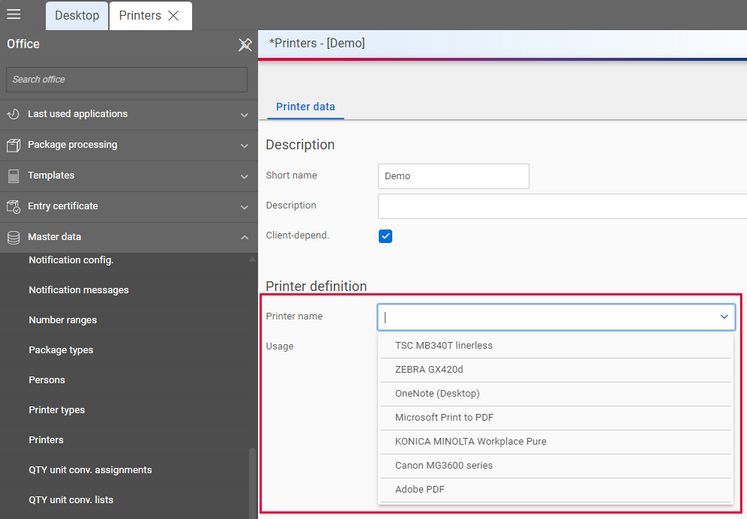
- From the Office, go to Master data – Printers to create printers. Click New.
- Select a unique Short name and Description.
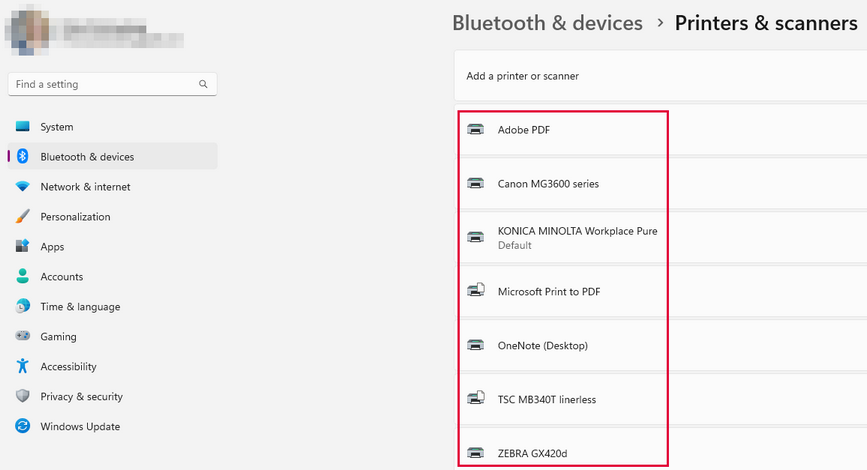
- Use the entry in the Printer name field to control the physical printer on which a document generated with this printer is to be printed. In order for Carrier Connect to find the correct physical printer, it must correspond exactly to the name in Windows.
- You use the Printer type to control the printer model for which the document is to be generated.
- Under Usage, select the Workstation/network printer radio button.
- Click Save & close to save your entries.
If you have not yet installed the AEB Service Agent, you’ll be prompted to do so. With the AEB Service Agent, Carrier Connect can establish a connection to the locally available printers. How do I install the AEB Service Agent?
An entry in the Printer name field is only required if you want to print
– via the user interface or
– in PRINT mode.
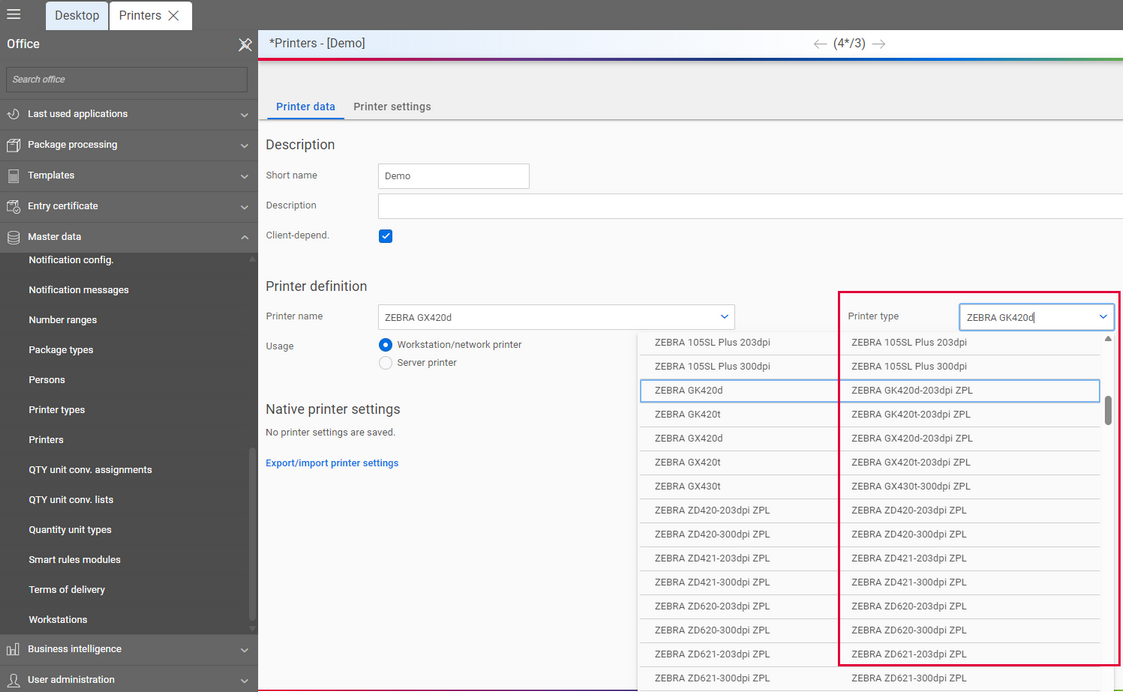
If you don’t see your printer model in the list, create a ticket in the AEB Help Center. Report the printer model and resolution (dpi) so that we can run a feasibility test and provide you with a non-binding quote.
How to use your own printer settings
Directly at the printer
If you need your own printer settings to prepare labels – because you generate labels using thermal transfer printing or the print head requires different heat or speed parameters, for example – you can save the settings directly to your printer.
Directly in Carrier Connect
Otherwise, you can upload the respective printer settings directly to Carrier Connect by going to Master data – Printers – Printer data – Native printer settings and clicking on Edit.
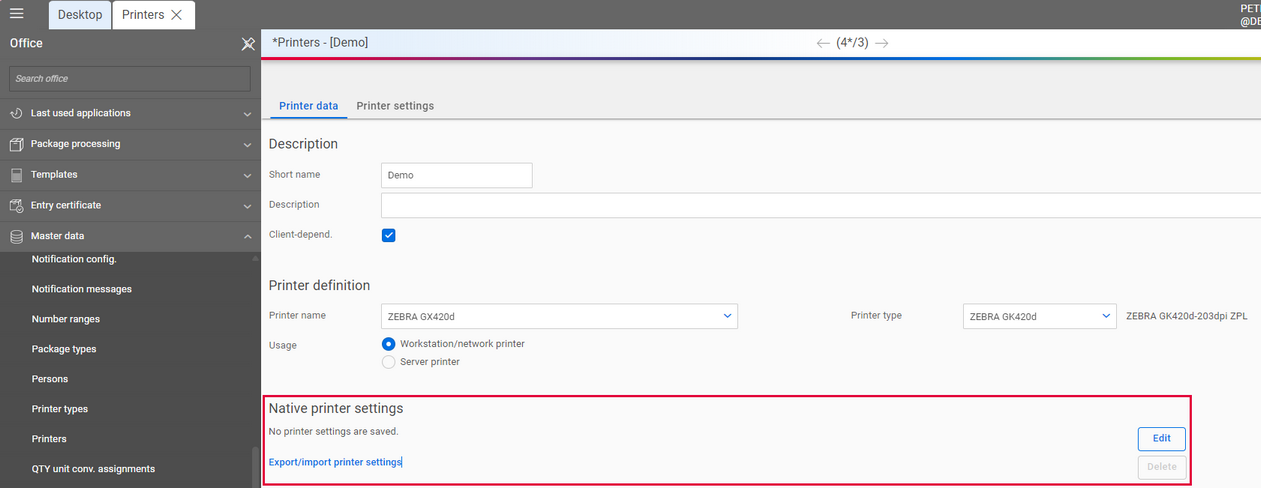
If you upload your printer settings to Carrier Connect, you have to install and configure the approved version of the printer model’s Nicelabel driver on the client from which you upload the settings. The Nicelabel printers are available for download in the AEB Service Portal under Other – Software: driver for printers.
The correct settings depend on your printer model, the label size, and the medium used (e.g. continuous roll, roll with gap, roll with marker, thermal direct/thermal transfer paper, RFID chip). For more details see section Configuring printer drivers for thermal printers and the respective printer documentation.