Creating companies and employees

Make sure that you have the I_CAI_EDITMASTERFILEDATA or I_CLIENTADMIN role. How do I assign myself a role?
How to create companies and employees manually in the master data and assign the “Shipping point” company role to your shipping point address
- From the Office, go to Master data – Companies to create companies. Click New.
- On the Company sheet, enter all the desired fields.
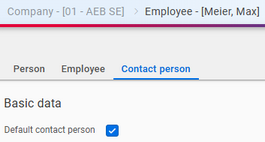
- Optional: You can create contact persons on the Employees sheet. Open the employee entry and maintain the required data.
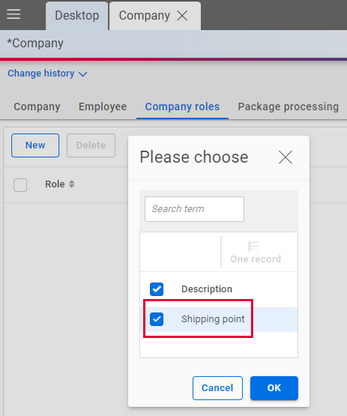
- Important setting for your shipping point address: On the Company roles sheet, click on New and select the “Shipping point” company role.
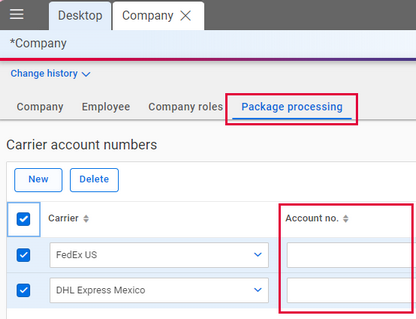
- Optional: You can enter the account numbers (customer codes) of service providers on the Package processing sheet.
- Click Save & close to save your specifications.
You must at least create the address of your shipping point. This is the address from which your packages are to be collected.
Only create additional companies if you want to enter shipping orders directly in Carrier Connect and select companies from the master data and/or want to process chargeable consignments (see step 5 “Enter account numbers of service providers").
The company code clearly identifies the company (ID).

Do you want to use a default contact in addresses? On the Contact person sheet, check the Default contact person box. The data of the default contact is then used as a contact in the address types shipping point, consignee, alt. bill-to party, pickup address, notify address, cover address, customs broker, alt. carrier address, importer if you transmit the initFromCompanyMasterFileData field of the corresponding address segment with true in the createShipment API call.
This makes sense if you have entered other company addresses in addition to your shipping point address and these are to pay freight costs or customs duties. In the case of chargeable consignments, the account numbers are then initialized in the shipping order on the Shipping options sheet for the freight payer both via host systems (if the API fields initPayerOfChargAccNoFromCompanyMasterData or initPayerOfDutAccNoFromCompanyMasterData are transferred with true ) and directly in Carrier Connect. The same applies to the customs debtor (payer of duties and taxes). You can find out more about this in the API documentation: Understanding Customer Account Numbers.
How to import companies as .CSV file
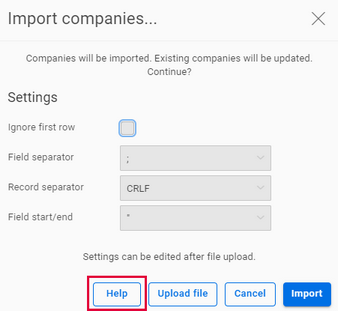
- Go to Master data – Companies. In the company overview, click on Import.
- Check whether the pre-filled details under Settings match your CSV file.
- Use the Upload file button to select your CSV file and upload it to Carrier Connect.
- Save the data and close the import using the Import button.
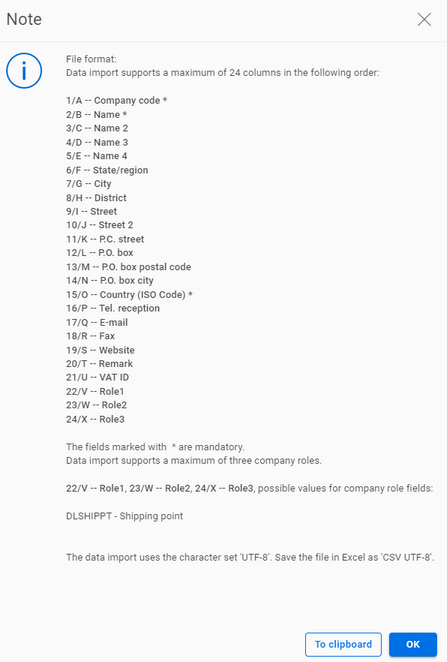
Important information on the structure of the .CSV file is available via the Help button.
In the help, you can use the Copy to clipboard button to copy the header lines to the clipboard, e.g. for use in Excel.